


Landscape Photography - After The Shot
- Daniel Wretham

- Jun 26, 2019
- 13 min read
Updated: Aug 19, 2022
It seems quite a popular thing today for landscape photographers to list the contents of their back pack and share with readers what they use out in the field which I will no doubt do as well at some point but I thought why not share everything that comes after the picture for a change ?
So many people forget this part of the process and focus heavily on the taking of the picture aspect, which don't get me wrong is massively important and should absolutely be got right in camera first but you don't often hear what people use after they have got it.
For me the process of the picture being caught on camera is just the very start, the process that comes after from downloading your picture to having it hanging on a wall is equally important but far less talked about.
I have always made the comparison of the taking of the picture being a movie script and the post processing is the performance, a good performance and good script are equally important if you want a brilliant production.
The idea here isn't to say "Look at the kit I've got" but more to say, this is WHY I have this and to another degree, I got this but wished I hadn't and then had to get this......
Hopefully saving a few of you some hard earned cash in the process and giving you an idea of which things work best.
So you've been out, you've caught some cracking light and you can't wait to download your pictures on to your computer and start the second part of the process, the aftermath.

Computer/Monitor
For my computer I decided to go for an Apple iMac 27" 5K Retina display which was fitted out with a larger SSD drive and a lot of extra RAM and the fastest processor I could get and I have to say I'm very impressed with it.
The importance of extra RAM is something that most won't have been bothered by until they started using process heavy programs like Photoshop that require a lot of memory.
I was originally a PC man but after a long time decided to make the switch from PC to Apple in order to sync across many devices and I just felt they were better made, less prone to virus attacks etc......
I liked to process on the 27" display as it was really crystal clear and a joy to use.
The price is expensive but I do feel that its very well made and does what I want it too so therefore can be justified.
So all sounds good so far BUT would I change anything ? Well, yes I would actually and eventually I will do.
Instead of going for the IMac I would now have gone for an Apple Mac Mini simply because I would have preferred to use a different display rather than Apples own which is only capable of reproducing colour up to sRGB colour spaces, what would have been better would be a dedicated matte monitor such as those by BenQ or Eizo which are capable or reproducing 99% of the RGB colour space.
This might seem like a small thing but when you get into printing it becomes the be all end all of everything and colour reproduction is right at the top end of your priorities.
The diagram below shows the colour difference between sRGB & RGB, and further to this is "Pro Photo" colour space but that makes no sense to use to me as you don't have monitors capable of showing it so you are effectively looking at colours you can't see ? Maybe science will catch up in future but for now the most sensible profile to use is RGB.

I can still run one of these dedicated monitors alongside my iMac but it would have been much better and cost effective to get it and either a Mac mini or a PC to run it with, you live and learn !
Now I must stress here that the iMac will suit 99% of people for their landscape photography and it really is a great system and worth investing in, My decision to change from it is purely based on the printing aspect and the fact the display would be capable of producing 99% of the RGB colour space rather than just sRGB so don't feel any need to rush out and get a set up like that unless you are going to be doing a lot of printing.
If you use a lab for printing and don't ever intend to do home printing then there is simply no need for the specialist monitors, if however you intend to eventually buy a decent gallery quality printer further down the line then its worth going the dedicated monitor route first as trust me, you will end up wanting one.
I also have a Mac Book Pro for when I am away for periods of time to store my photos and work on again with upgraded RAM and processor.
Lap tops in my mind are not great to process on and I now actively avoid doing so, instead using it to upload my RAW files to dropbox etc so I have a good back up while away from home.
I can't quite put my finger on what it is I don't like about editing on laptops but I can tell you that I won't do it full stop anymore and in theory it would have been a waste of money, fortunately for me this is a work lap top of which it performs perfectly but for photo editing its not even on my radar anymore.
My advice would be always go the desk top route and if you want something to simply upload pictures or store them then get a small simple lap top that doesn't cost much instead.
Post Processing
I use Adobe Camera Raw and Adobe Photoshop for all my processing, when I started Photoshop was light years ahead of Lightroom and was well worth taking time to understand and learn the program as it was capable of so much more than Lightroom.
In recent times there seems to have been a much larger investment into Lightroom and it has now become a really powerful program with some really great editing options but it still doesn't beat Photoshop.
Photoshop works with a series of layered adjustments and this alone makes it far easier to target specific areas for adjustment and gives you a far higher degree of control than Lightroom.
Now I don't want to turn this into a Photoshop V Lightroom debate as that's always a heated affair so I will simply say, Photoshop is the right choice for me so its what I use for my photo processing.
Lightroom is a great program to start off with and will enable quality results but you should always look at it as a starting point to learn the basics of editing. Once mastered, Photoshop is the next logical option and one you should aspire to learn as it will open up new possibilities for you in your workflow and understanding.
I have flirted with a few other plugins for Photoshop but in reality I don't really use any now as I've found none are as good as Photoshop itself. There is the odd exception and some programs like luminosity mask generators can be very handy and speed up your workflow as well as making it very precise.

Graphics Tablet
I use a Wacom Intuos Pro Medium in place of a mouse as it allows me to have far greater accuracy on edits due to being pressure sensitive so you can vary either the opacity of the area you are drawing or the layer for example, you just can't do that with a mouse.
The other main advantage for this is the fact that I am editing with a pen rather than a mouse and the action of holding a pen has been something that you have been doing since your earliest years and its incredibly natural and that reflects in your workflow I personally believe.
Renowned landscape photographer, Thomas Heaton has just discovered the benefits of using one of these tablets and if you follow his Youtube channel you will see he has just done a new video which shows just how excited he was to try it and saw the benefits right from the start.
These tablets do take a little getting used too and to start with you will want to simply give up and stop using it, but after as little as 24 hours you will be really in the swing of it and it will be second nature and you will wonder how you ever managed without one.
For me it is a really key part of my editing workflow for these simple reasons, its precise, its fast, its natural.
At some point I will get round to writing a review of it so keep your eyes peeled if you would like to know more about it and how it can benefit you.

Colour Management
I use a Datacolor Spyder X pro to make sure my screen is correctly calibrated so my prints will match what's on screen, I have just reviewed this item HERE so I won't bore you by going over this again suffice to say that this is one of the best devices I have ever used and I can't sing its praises highly enough.
I use this every week without fail across all devices and its simply fantastic.
External Storage
This is one of the most important purchases you can make when it comes to your landscape photography.
If you have ever lost your pictures you will know just how heart breaking this is and no price can be put on safety of these precious images that we spend so long chasing after.
Backing up your files is often misunderstood, having a single external hard drive with all your stuff on is not a back up, its a accident waiting to happen.
If you don't have two back ups then you don't have a back up, let me explain.
I had a single external hard drive which had 2 terabytes of pictures on it, years of hard work and adventures. One day I accidentally dropped it while transporting it and that was it, everything on it was gone, It wasn't able to be recovered and I lost the lot. It was absolutely gut wrenching and I almost gave up everything as I just couldn't believe years of work were just erased with one simple accident.
Now as you can imagine I am extra careful about this, I use two identical 4TB external hard drives from Weston Digital which are kept in different buildings.
That way if one fails (And believe me they do) then you have the same information on another and your precious memories are now safe.
God forbid your building burned down, you have another safe at a different location. This might seem a bit extreme but once you have lost work then you are ultra cautious and doing this has saved me on two separate occasions now.
Once these devices are full (And with todays large file sizes it happens quickly) they are stored and new ones purchased. The prices of these drives nowadays are so cheap it is crazy not to do it.
I also use Dropbox to store a lot of things and also to help transfers files between the external hard drives in different locations, it's a great back up solution and free to everyone (Costs only apply if you upgrade).
Finally I carry an external hard drive with me while away so I can safely store files on it.
Portable Hard drives need to be really well protected if they are going to travel with you and I recommend the LaCie range as they are super tough and very well protected and go up to 4TB from memory. These drives are shock, rain & pressure resistant so it makes them the only sensible option to travel with.

Printing
Worth noting here that while all my editing is all done in Photoshop, all my printing is done through Lightroom.
Lightroom is a far more user friendly program for printing, its soft proofing workflow is nice and easy to use and in fact way better than Photoshop in my opinion.
Now printing is an option that will only really appeal to a handful of people as its seriously expensive if you want to do it properly and its also a commitment that you have to make in order to warrant a printer.
Let me break it down to you, You can send your prints off to a lab and they will be done on a hugely expensive machine and come back most likely looking pretty dam good and you will be very happy with them all for a very affordable price, so why on earth would you bother with home printing ? In a word, Control.
Those of you who have had prints come back that are vastly different colours or darker than expected and just don't look the way you thought they would will know the feeling of disappointment and will understand the wish to do your own prints instead.
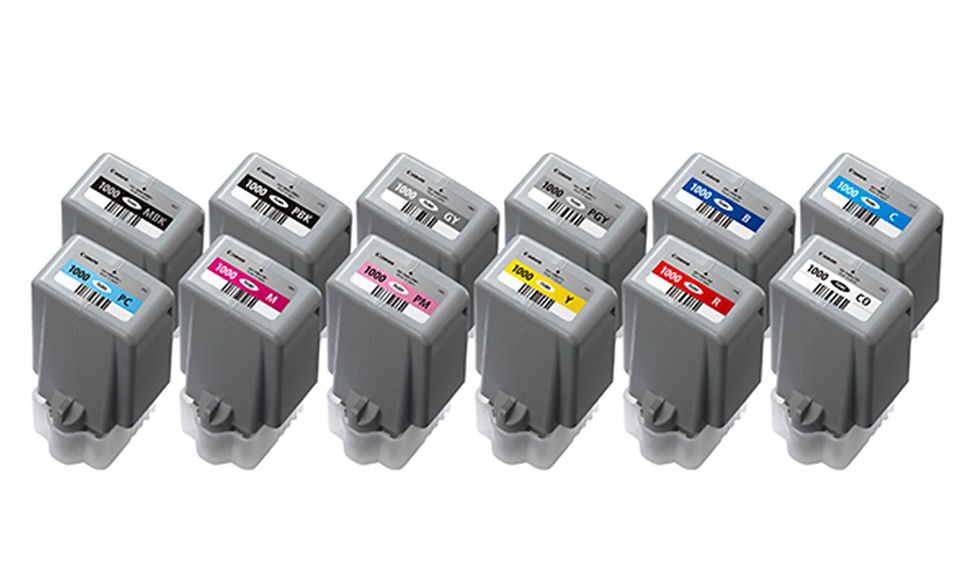
These days you are not limited to printing in just CMYK colour spaces with the range of printers that come with up to 12 different colour ink sets and pigment inks it has never been better to be able to reproduce what you see on the screen to the print itself.

My printer of choice is the Canon PROGRAF PRO1000 and it is quite simply exceptional and is capable of producing gallery quality prints up to A2 in size.
Now this is quite an expensive printer for its outright purchase price but it is affordable to most, there is however a catch, and its a big one.
The price of the printer is just the tip of the iceberg here and you need to understand just how much this is going to cost you in the long run, for example to replace an entire ink set is going to cost you around £500 !!! Thats not a misprint, I really did say £500, that's nearly the cost of printer itself !
Every time you need to replace a full ink set, £500 ! just say that again to yourself, are you sure you want to print at home ?
Now you maybe thinking well I will only be printing once in a while and I want the best so its ok but this is where you're wrong.
These printers use pigment inks and in order to stop themselves from clogging up they run cleaning cycles, These cleaning cycles use INK to clean the lines ! and a lot of it, its like liquid cash going down the drain.
The printer will run cleaning cycles at roughly 60 hours, 240 hours & 480 hours and you can watch your ink levels drop like a stone.
No problem you say, I can just switch it off till I use it again right ? Well you can, but say you switch it off and unplug it for just one day, when you next switch it on it will automatically run a nozzle check and do a full 480 hour system deep clean, in english that's bye bye half my ink !
Now there are plenty of companies who offer after market ink which is far more affordable but lets be clear here its just simply not the same ink as the OEM inks and the colours can vary dramatically, I would only ever use Canon OEM ink even though it is stupidly expensive the quality is mind blowing and that is worth paying for.
The only way to use these printers and make them viable is to print often, if you do that then you avoid the cleaning cycles to a degree and it can be worthwhile.
In order to sell my prints I print something every other day to build up a stock, I also do printing for a few fellow landscape photographers, They get gallery quality prints on gallery fine art paper for a cheaper mates rates price and I get to keep the printer turning over so it works out to be quite a good system but make no mistake you are making a serious commitment if you get a printer, be sure you are ready for it in both time and money.
Once you have got a printer then you will need printer paper and some form of precision trimmer too which all adds up to the cost, all told a good selection of paper, spare ink set, maintenance cartridge and printer of good quality will set you back in the region of close to £2000. So stick with a lab right ?.
For most of you that will be the sensible decision but If you are selling pictures and doing a reasonable volume of them then it can make sense, nothing beats printing your own work and having full choice of how it comes out and onto what paper etc.
These days images end up on social media, they are scrolled past and forgotten, Pictures are meant to be hung & seen. If your proud of your work then show it, don't let it be a forgotten digital dustbin.
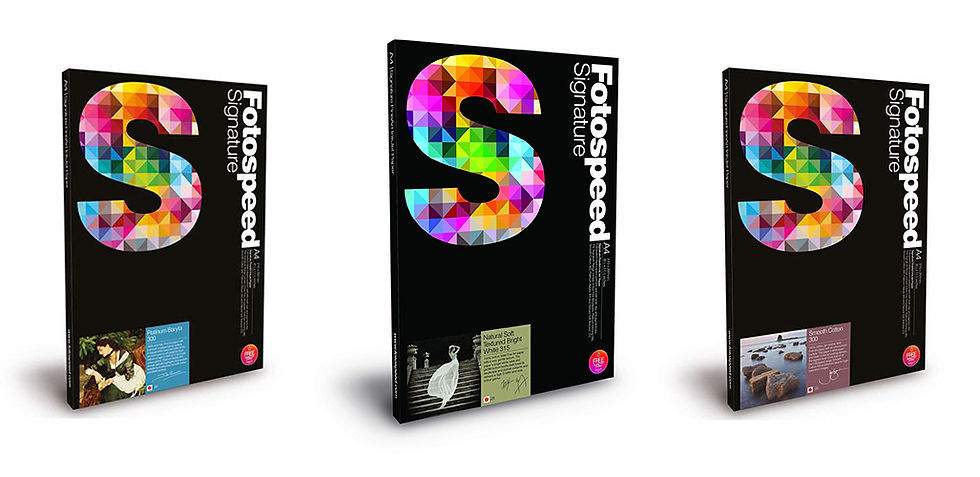
Photo Paper
Printer paper is a really personal thing, one persons choice is not always the same as another and different photos can look completely different on different papers.
With this in mind this is purely my personal choices after trying lots of different types these are the ones I decided on and the reasons why.
For every day prints I use Canon Pro Lustre paper, its has a gorgeous deep semi gloss finish but doesn't have the reflective issues of glossy paper, it looks great behind glass. The colours a deep and true and I have many of my own personal pictures on this paper for my own home.
If you want to step up to something little better then you can go for fine art papers, now these have benefits to them in terms of the longevity of the print, they will last upwards of 85 years plus when used with quality pigment inks.
They are usually a little thicker than regular photo paper too and more like a card when you get above 300 gsm, not to mention they look simply stunning, hold colour better and often have better DMAX ratings which will help with shadow details.
My paper of choice all comes from Fotospeed and I can't recommend these guys highly enough, They will actually do a custom colour profile for your own printer and ink if you buy their paper and this was one of the best moves I ever made. Universal profiles for printers are good, but they are not next level like a custom profile and the colours are far better, id say near perfect reproduction in fact.
I use three different papers, starting with the Fotospeed Platinum Baryta 300 gsm paper which is much like the Pro Luster paper finish only way better quality and thicker. It gives pictures the best finish I have seen in a semi gloss paper and anything with high contrasting light or colours will look amazing on it.
My next paper is Fotospeed NST (Natural Soft Touch) Bright White 315 gsm this is a matte photo paper and it really lends itself well to images that perhaps have more shadow in as it holds the detail really well, it has a smooth texture and is really punchy with the colours and has no reflections at all. Its a cotton based paper and feels delightful to the touch and really has a classy feel about it, I tend to use this for waterfalls or forest scenes mainly where I want things to be a little more subtle.
Finally the last paper I use is Fotospeeds smooth cotton 300 signature paper. I can't really tell you what it is about this paper that makes me like it so much ? But woodland images especially come alive on it, the texture really shows up the detail in the bark of the trees and the colour rendition is fantastic, While this is the least used of my papers its selected for a very specific type of image and when you see it you will see why.
Any landscape photo where texture is really important to the image then this is the paper I reach for.
So there you go that's my entire kit list for everything after the shutter button has been pressed, I hope that helps give you an insight into the process and hope it might help you avoid some of the mistakes I have made along the way or gives you ideas of where to start on your home set up.
If you have any questions please feel free to get in touch or if you have any fine art print enquiries for your own work then once again simply give me a message and I will be happy to help.
As always, Happy Shooting.
Daniel Wretham
Just a footnote to say that I am in no way associated with any of the companies or products that I have mentioned on here, All have been purchased with my own hard cash from retail stores.


